

For many homeowners, keeping a house clean feels like an endless cycle of surface dusting and quick vacuuming. Beneath that superficial layer of cleanliness, a more stubborn build-up is constantly underway. Grime, grease, and microscopic debris settle into corners, appliances, and mechanical systems. Left unchecked, this accumulation degrades building materials, compromises air quality, and forces household systems to work harder, reducing their lifespan. True home maintenance requires moving beyond daily tidy-up to understand the science of how filth forms, dismantle it safely, and set up barriers to keep it from returning. By taking a room-by-room approach, you can transform your environment from temporary neatness to long-term hygiene.
Stripping Sticky Residue from High-Contact Areas

Standard kitchen cabinets and backsplashes quickly lose their luster under this layer of polymerized grease. Because this film is highly acidic and organic, tackling it requires an alkaline counter-agent rather than standard dish soap.
- The DIY Alkaline Solution: Mix two tablespoons of washing soda (sodium carbonate) with a quart of warm water and a few drops of liquid Castile soap. Washing soda has a higher pH than baking soda, making it exceptionally effective at cutting through aged grease without stripping paint or wood finishes.
- The Wipe-Down Technique: Apply the solution with a microfiber cloth, working in circular motions. Avoid soaking wood cabinets; instead, let the damp mixture sit on the surface for two to three minutes to break the chemical bonds of the grease before wiping clean with a damp, fresh microfiber cloth.
- Protecting Your Work Zones: Keeping your countertops free of grime requires understanding the material you are cleaning. For natural stone like granite or marble, avoid acidic cleaners like vinegar or lemon juice, which can permanently etch the surface. Instead, use a pH-neutral cleaner specifically formulated for stone, and commit to resealing natural stone surfaces once a year to prevent liquids and cooking oils from penetrating the porous material.
Maintaining the Unseen Drainage and Waste Systems
Cooking fats, oils, and grease—collectively known as FOG—should never go down the drain. Even when flushed with hot water, these substances cool inside the cold underground pipes, solidifying into blockages that catch food debris and harbor foul-smelling bacteria.
- Preventing the Slow Drain: Always scrape plates and pans into the trash or a compost bin before washing. For greasy pans, wipe them down with a dry paper towel to capture the bulk of the oil before they ever touch the soapy dishwater.
- A Weekly Flush: Keep drain lines clear by pouring a kettle of boiling water down the sink, followed by a cup of baking soda and a cup of white vinegar. Let the mixture fizz for fifteen minutes to break up minor organic residues, then flush with more hot water.
- Addressing Commercial and Heavy-Use Systems: In larger estates, homes with commercial-grade kitchens, or properties utilizing specialized interceptors, standard home remedies are not enough to manage waste stream fats. To prevent catastrophic backups and terrible odors, scheduling a professional grease trap cleaning service is essential to vacuum out accumulated grease solids and keep waste lines flowing freely.
Dissolving Stubborn Mineral Scale and Soap Scum
Soap scum is not just dried soap. It is a chemical compound formed when the fatty acids in soap bar lipids react with the calcium and magnesium minerals present in hard municipal or well water. This reaction creates an insoluble white or gray film that clings tenaciously to smooth surfaces.
- The Acid Attack: Since soap scum is highly alkaline, it must be dissolved using a mild acid. A mixture of equal parts warm white vinegar and blue dish soap is highly effective. The vinegar breaks down the mineral bonds, while the dish soap suspends the loosened fats so they can be easily rinsed away.
- Restoring Clear Views: To clean glass shower doors, spray the acid-and-soap mixture thoroughly over the glass and let it dwell for fifteen minutes. Use a non-scratch scrub sponge to work the mixture into the glass, then rinse with warm water.
- The Prevention Habit: The absolute best way to stop soap scum from forming on glass shower doors is to prevent water from drying on them. Keep a squeegee in the shower and spend thirty seconds wiping down the glass after every single use. Follow this up by switching from traditional bar soaps to liquid body washes, which do not contain the binding fats that trigger the soap scum reaction.
Managing Moisture to Prevent Biological Growth
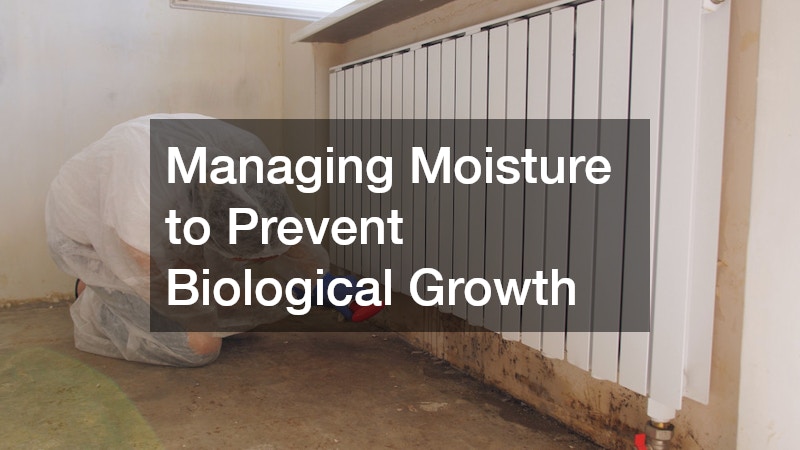
Mildew and mold thrive in warm, dark, and damp environments. A bathroom that remains humid for hours after a shower is an open invitation for spores to take root in porous grout lines, silicone caulking, and painted drywall.
- Active Ventilation: Run your bathroom exhaust fan during every shower and leave it running for at least twenty minutes afterward. If your fan does not clear the mirror within ten minutes of turning off the shower, it may be dirty or undersized for the space.
- Grout Maintenance: Seal your tile grout lines annually with a penetrating grout sealer. Grout is highly porous and will readily absorb dirty shower water; sealing it creates a hydrophobic barrier that keeps moisture and mold spores on the surface where they can be wiped away.
- When Mildew Becomes Mold: While light mildew on grout can be scrubbed away with diluted hydrogen peroxide, systemic moisture can lead to mold behind drywall or under subfloors. If you discover widespread, dark growth, or if a musty smell remains after cleaning, seek professional mold remediation to safely contain spores, identify the water leak, and replace the materials without contaminating your home.
Flushing Sediment and Mineral Build-Up from Pipes
Every gallon of water entering your home carries dissolved minerals. When water is heated, these minerals—primarily calcium carbonate—precipitate out of the liquid and solidify on the hottest surfaces they can find, such as the heating elements inside your water heater and the interior walls of your copper or PEX pipes.
- The Cost of Scale: Scale acts as an insulator. In a water heater, a mere eighth of an inch of scale build-up can increase your energy consumption by up to fifteen percent, as the burner must heat through the rock before it can heat the water.
- The Annual Flush: To prevent this build-up, turn off your water heater’s power source, attach a garden hose to the drain valve at the bottom of the tank, and run the water to an external drain until it runs clear of white, chalky sediment.
- Enlisting Professional Help: If your home suffers from low water pressure, rattling pipes, or no hot water, scale may have narrowed your pipe diameters. Calling professional plumbing services is critical to chemically descale the lines or evaluate if localized repiping is needed to restore safe, clean water flow.
De-sludging Heating Systems for Optimal Winter Warmth
If your home utilizes a boiler and radiators or underfloor hydronic heating, the water inside that system is constantly recirculating. Over years of operation, the oxygen in the water reacts with the iron inside the boiler and radiators, creating a black, muddy substance known as iron oxide sludge.
- The Warning Signs: If you notice that certain radiators are cold at the bottom but warm at the top, or if your heating system makes metallic banging noises when it kicks on, you are likely dealing with a severe sludge build-up.
- Restoring Hydronic Flow: This sludge settles in the lowest parts of the system, restricting flow and forcing the boiler to burn more fuel to heat the home.
- The Annual Check-Up: To prevent internal grime from affecting heating efficiency, secure professional boiler services. A technician can perform a power flush of the heating loop, remove oxide sludge, install magnetic dirt separators to catch debris, and introduce chemical corrosion inhibitors that protect the system’s metallic integrity for years.
Maximizing Filtration and Airflow Efficiencies

The first line of defense against airborne grime is your HVAC filtration system. Many homeowners view filters merely as a way to clean the air they breathe, but their primary engineering purpose is actually to protect the delicate internal coils of the air handler from being blanketed in dust.
- Understanding MERV Ratings: The Minimum Efficiency Reporting Value (MERV) ratings range from 1 to 16. For residential systems, a filter rated between MERV 8 and MERV 11 captures microscopic dust, pollen, and mold spores effectively while maintaining good airflow and not straining the system’s motor.
- Establish a Replacement Schedule: Check your filters every thirty days. If you have pets, live in a high-pollen area, or are undergoing home renovations, you may need to replace them monthly. Otherwise, a fresh filter every sixty to ninety days is sufficient to keep system dust to a minimum.
- Keeping Vent Grills Clean: Dust accumulates on return and supply vent registers due to static electricity. Vacuum these grates monthly with a brush attachment and wipe them with a damp microfiber cloth to prevent dust from blowing back into living areas. Consider contacting reputable air conditioning companies to inspect your ductwork for leaks, as unsealed ducts can pull dusty air from crawlspaces and attics into your living areas.
Decontaminating the Core of Your Ventilation Network
Even with diligent filter changes, fine dust eventually passes the filter, coating the evaporator coils and blower wheel. When moisture from air conditioning mixes with this dust, it forms a damp, dirty paste on the coils, which can sprout mold and emit musty odors throughout the house.
- The Danger of Clogged Coils: Dirty coils cannot transfer heat efficiently. This causes your system to run longer cycles, skyrocket your energy bills, and potentially freeze up the system, causing costly water damage when the ice melts.
- Professional Intervention: Cleaning the delicate aluminum fins of an evaporator coil requires specialized tools and chemical foam rinses that are difficult and dangerous to apply without professional training.
- Preserving Your Air Quality: Scheduling comprehensive, professional HVAC services once or twice a year ensures that the interior cabinet, condensate drain lines, blower motor, and coils are thoroughly sanitized, keeping your indoor air pristine and your monthly utility costs low.
Clearing Biological Growth from Shingles
If you see dark, vertical streaks on your roof, it’s not soot or dirt. It’s a cyanobacteria called Gloeocapsa magma. This bacteria feeds on the limestone filler in asphalt shingles, gradually eating the granules that protect your roof from ultraviolet rays.
- The Threat of Moss and Lichen: When leaves and organic debris rot in valley lines or near chimneys, they trap moisture against the roof. This dampness fosters moss and lichen growth. As moss grows, its root-like structures lift shingle edges, allowing rain to seep underneath and rot the wood decking.
- The Soft-Wash Solution: Avoid using a high-pressure power washer on asphalt shingles, as it will remove protective mineral granules and ruin the roof. Instead, apply a “soft-wash” solution of equal parts household bleach and water mixed with a surfactant. Spray it on the shingles, let it sit for twenty minutes to eliminate biological growth, and rinse with a low-pressure garden hose.
- Prioritizing Safety: Walking on a wet, soapy roof is dangerous. To ensure safety and proper chemical use, it’s best to hire professional roofing contractors. They have the safety harnesses, ladders, and experience necessary to clear roof grime without damaging the structure.
Knowing When Grime Has Compromised Structural Integrity

Sometimes, exterior cleaning comes too late. If moss, algae, and rotting leaf debris have been ignored for years, moisture will have already found its way past the shingles, rotting the plywood sheathing and causing the roof structure to sag.
- Inspecting the Attic: Regularly head up to your attic with a flashlight during a heavy rainstorm. Look for dark water stains on the rafters, damp insulation, or active dripping.
- The Signs of Systemic Failure: If you notice widespread buckling shingles, bald spots where the protective granules have completely washed away, or extensive wood rot in your attic, simple cleaning will no longer save the roof.
- Biting the Bullet: At this stage, attempting to scrub or patch the shingles is a waste of resources. To protect your home’s foundation, walls, and interior ceiling from catastrophic water damage, investing in a complete roof replacement is the only viable path forward to restore a secure, dry envelope for your property.
Keeping a home free of filth is not about achieving a sterile environment overnight. It is about building consistent habits and recognizing when maintenance is needed. By understanding the chemical relationships behind kitchen grease, bathroom scale, and HVAC dust, you can choose the correct cleaning solutions and prevent build-up. Whether it’s a quick daily squeegee of the shower glass, an annual flush of the water heater, or calling in professionals for deep care, every proactive step shields your home from neglected grime. Start by cleaning a high-impact area, establish a preventive habit, and enjoy the peace of mind that comes with a clean, healthy home.